

Overview
Facebook and Instagram ads remain some of the most powerful growth levers for DTC ecommerce and Shopify brands. In 2024, Meta accounted for over 20% of total US digital ad spend, making it impossible to ignore for any brand that wants to scale.
But getting the setup wrong is costly. Without proper tracking, domain verification, product feeds, and campaign structure, you risk losing data and wasting ad dollars.
This step-by-step guide will show you how to set up Facebook Ads for Shopify the right way, so you can track data accurately, build powerful audiences, and scale profitably.You’ll learn how to install the Shopify app, configure Meta Pixel and Conversion API, set up domain verification and AEM, create a Commerce Account, sync your product catalog, launch Shops, build audiences, run Dynamic Product Ads, and structure full-funnel campaigns. By the end, you’ll have a setup designed to capture accurate data and scale profitably.
Prefer a checklist format? Download the full SOP PDF here
Shortcuts
- Pixel, Conversion API & Domain Verification
- Product Catalog & Shops Setup
- Audiences (Custom, Lookalike, Engagement)
- Dynamic Product Ads (DPAs)
- Full-Funnel Campaign Structure
- Tracking with UTMs & GA4
STEP: 1 Install the Facebook App in Shopify
Start by going to the Shopify App Store and searching for Facebook & Instagram by Meta. Add the app, review permissions, and confirm installation. Most apps include an onboarding wizard that will walk you through connecting your Business Manager, ad account, and Instagram profile.
During setup, review subscription terms if it’s a paid app, check theme compatibility, and enable app embeds if required for storefront features.
STEP: 2 Set Up Meta Pixel & Conversion API
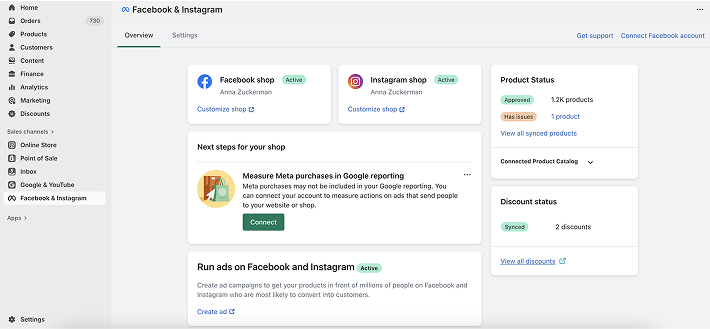
In Shopify Admin, navigate to Settings → Apps and Sales Channels → Facebook & Instagram and open the app. Log into your Facebook account, connect your Business Manager, ad account, Page, and Instagram profile.
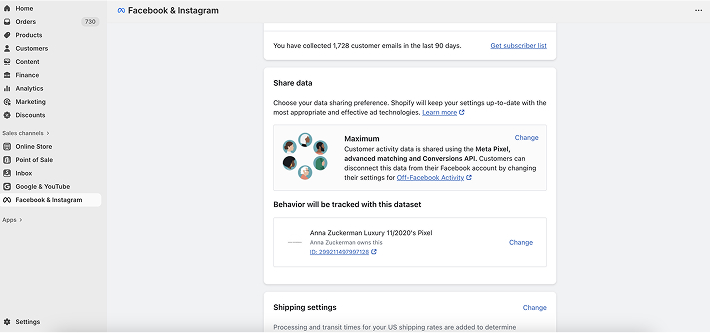
Under Data Sharing Settings, choose Maximized. This enables both the Meta Pixel (browser events) and Conversions API (server events), ensuring data flows even if cookies are blocked. Save and confirm the Pixel ID appears in Shopify. Then test events in Meta Events Manager — you should see browser and server events like PageView, AddToCart, and Purchase firing correctly.
Domain Verification
Domain verification is required for accurate tracking. Inside Business Manager, go to Brand Safety → Domains and add your Shopify domain. Verify using DNS, HTML file, or meta tag. Once verified, assign the domain to your ad accounts, pixels, and catalogs.
Aggregated Event Measurement (AEM)
With the domain verified, set up AEM in Events Manager. Select your domain, click Manage Events, and configure up to eight prioritized conversion events. A typical ecommerce priority order is: Purchase, Add Payment Info, Initiate Checkout, Add to Cart, and View Content. Save and publish — changes may take up to 48 hours to apply.

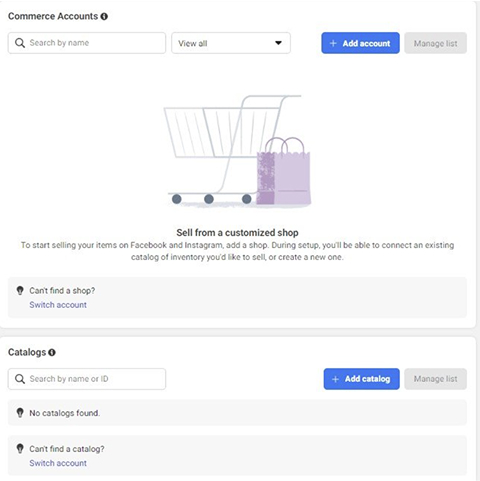
STEP: 3 Set Up a Facebook Commerce Account
Go to Meta Commerce Manager inside Business Manager and click Add Account → Create a Commerce Account. Choose Business (recommended), add your business details, and select a checkout method: on your Shopify website (most common), in-app on Facebook/Instagram (region-specific), or via messaging.
Next, connect your product catalog, assign assets like pixels and ad accounts, and add team members. If using in-app checkout, set up policies, shipping rules, and bank account details. Finally, submit for Meta’s approval (usually reviewed in 24–48 hours).
STEP: 4 Sync Your Product Catalog & Set Up Shops
Add the Facebook & Instagram Sales Channel in Shopify. Log in with your Business Manager credentials, connect the correct ad account, pixel, and catalog. Products will sync automatically from Shopify into Commerce Manager.
Verify each product includes a title, description, price, availability, images, and links. Keep product data clean and consistent, and use Product Sets in Commerce Manager for campaigns (e.g., Best Sellers, New Arrivals).
With the catalog ready, set up Shops in Commerce Manager. Choose checkout method, connect your product catalog, and customize branding with collections, logos, and cover images. Submit for Meta approval and test the checkout flow before running ads.

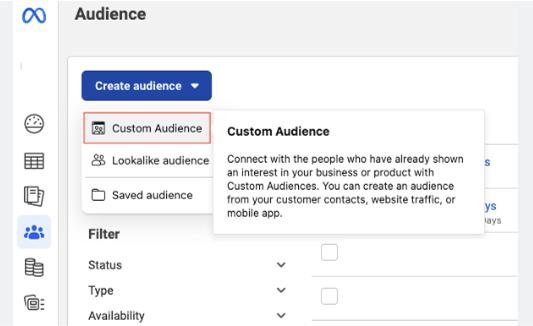
STEP: 5 Create Custom, Lookalike, and Engagement Audiences
Audiences are the foundation of Facebook Ads. Start with Custom Audiences: website visitors (30–90 days), Add to Cart but not purchased (7–30 days), and Purchasers (180 days).
Expand reach with Lookalike Audiences based on high-value sources like Purchasers. Test different ranges: 1% for highest similarity, 2–3% for balance, and 5–10% for scale.
Add Engagement Audiences from Instagram and Facebook interactions. Examples include video viewers (25–95% completion), profile engagers, or post interactions in the last 30–90 days.
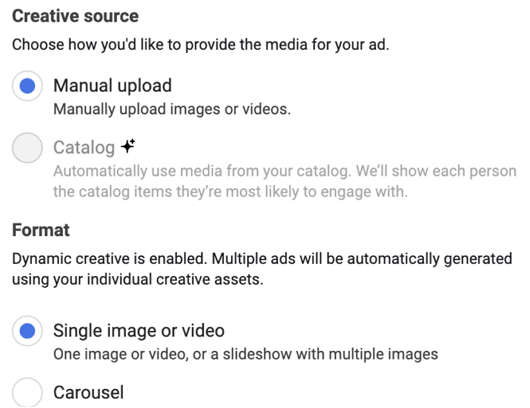
STEP: 6 Launch Dynamic Product Ads (DPAs)
With your catalog synced, you can run Dynamic Product Ads. In Ads Manager, create a Sales → Catalog Sales campaign. Choose retargeting for people who viewed products or added to cart, or prospecting with lookalikes.
Use Carousel or Collection formats that automatically pull product info. Add dynamic overlays like price, discounts, or free shipping. A strong primary text could be: “Still deciding? Complete your purchase today.”
STEP: 7 Build a Full-Funnel Campaign Structure
Successful Facebook Ads rely on covering all funnel stages:
- Top of Funnel (TOF – Awareness): Prospecting with broad audiences and lookalikes. Use UGC, lifestyle content, and storytelling creatives. Optimize for ViewContent or Purchase.
- Middle of Funnel (MOF – Consideration): Retarget website visitors, IG/FB engagers, and video viewers. Use testimonials, social proof, and product education. Optimize for Add to Cart or Purchase.
- Bottom of Funnel (BOF – Conversions): Target Add to Cart or Checkout Initiated audiences. Run DPAs with urgency messaging like “Still in your cart.” Optimize for Purchase.
Best practice is to allocate budgets as TOF 60%, MOF 25%, BOF 15%, refresh TOF creatives every 2–3 weeks, and test different retention windows.
STEP: 8 Track with UTMs & GA4
Accurate reporting is key. Add UTM parameters to every ad in Ads Manager at the ad level under Tracking → URL Parameters. A standard structure is:
utm_source = facebook or instagram
utm_medium = paid_social
utm_campaign = campaign name (e.g., prospecting_august)
utm_content = creative name (e.g., carousel1, video_a)
Check GA4 under Reports → Acquisition → Traffic Acquisition to confirm campaigns are being tracked. Always use lowercase, consistent naming, and dynamic parameters (e.g., {{campaign.name}}, {{ad.name}}) for automation.

STEP: 9 Cross-Attribution with GA4
GA4 and Meta Ads use different attribution models, so expect 10–30% discrepancies. GA4 uses last-click attribution, while Meta uses data-driven attribution with conversion windows.
Always compare trends, not exact numbers. For best accuracy, combine Meta Conversions API + GA4 server-side tracking. Validate by checking GA4 traffic sources and comparing purchases against Meta Ads Manager.
FAQ
Do I need both Pixel and Conversion API?
Yes. Pixel captures browser events, while CAPI captures server-side events. Using both ensures more complete tracking.
What is Aggregated Event Measurement (AEM)?
AEM lets you prioritize up to eight events per domain, required for accurate tracking after Apple’s iOS 14 updates.
Can I run ads without a Commerce Account?
Yes, but you won’t be able to run Catalog Sales campaigns or Shops ads, which are essential for ecommerce.
What’s the best audience to start with?
Start with Website Visitors (30 days), Add to Cart (7–30 days), and Purchasers (180 days). Then expand with Lookalikes.
Why don’t GA4 and Meta Ads numbers match?
They use different attribution models. GA4 is last-click, Meta is data-driven. Discrepancies are normal. Focus on directional trends.
Can NANO help set up Facebook Ads?
Absolutely, NANO is a full-service marketing agency with experts in Facebook marketing.
Launch your Ads
Setting up Facebook Ads the right way is the first step toward building a scalable and data-driven ecommerce business. By installing the Shopify integration, activating Pixel and Conversion API, syncing your product catalog, and creating a full-funnel structure, you’ve now laid the foundation for long-term success.
At NANO, we’ve spent over 20 years helping brands like yours grow through strategic marketing solutions – from paid ads and email campaigns to complete digital transformation. Our team of senior specialists knows what it takes to turn setup into performance and strategy into sales.
If you’re ready to see measurable results from your Facebook Ads, start implementing these steps — and when you’re ready to scale, we’re here to help you take it further. Download the full SOP PDF here for an actionable checklist and set your Shopify campaigns up for success.